# Public Evaluation Platform User Guide
We have built an AWS-based platform for large-scale parallel evaluation of OSWorld tasks. The system follows a Host-Client architecture:
- **Host Instance**: The central controller that stores code, configurations, and manages task execution.
- **Client Instances**: Worker nodes automatically launched to perform tasks in parallel.
All instances use a preconfigured AMI to ensure a consistent environment.
## 1. Platform Deployment & Connection
### 1.1 Launch the Host Instance
Create an EC2 instance in the AWS Console with the following settings:
| Configuration Item | Value |
| -------------------------- | ------------------------------------------------------------ |
| AMI ID | `ami-0e49e0a70044dde43` |
| Instance Type | - `t3.medium` (Recommended for ≤5 parallel tasks)
- ` t3.large ` (Recommended for ≤15 parallel tasks)
- These numbers are based on using VSCode over SSH. You can save resources by running via CLI—`t3.large` supports up to 20 tasks that way.
- For higher parallelism, use a more powerful instance. |
| VPC | `vpc-0f207282fe145bcda` |
| Subnet | `subnet-0a4b0c5b8f6066712` |
| Firewall (security groups) | `sg-05f8e79c10a7768e4` |
| Storage | 50GB
- Consider increasing if storing multiple results to avoid crashes. |
Once launched, you will receive an instance ID like `i-xxxxxx`.
### 1.2 Connect to the Host Instance
#### Step 1: Prepare Your SSH Key
* When launching the instance, choose "Create new key pair" and download the `.pem` file (e.g. `osworld-host-key.pem`). Save it locally.

* Set appropriate permissions:
```bash
chmod 400
```
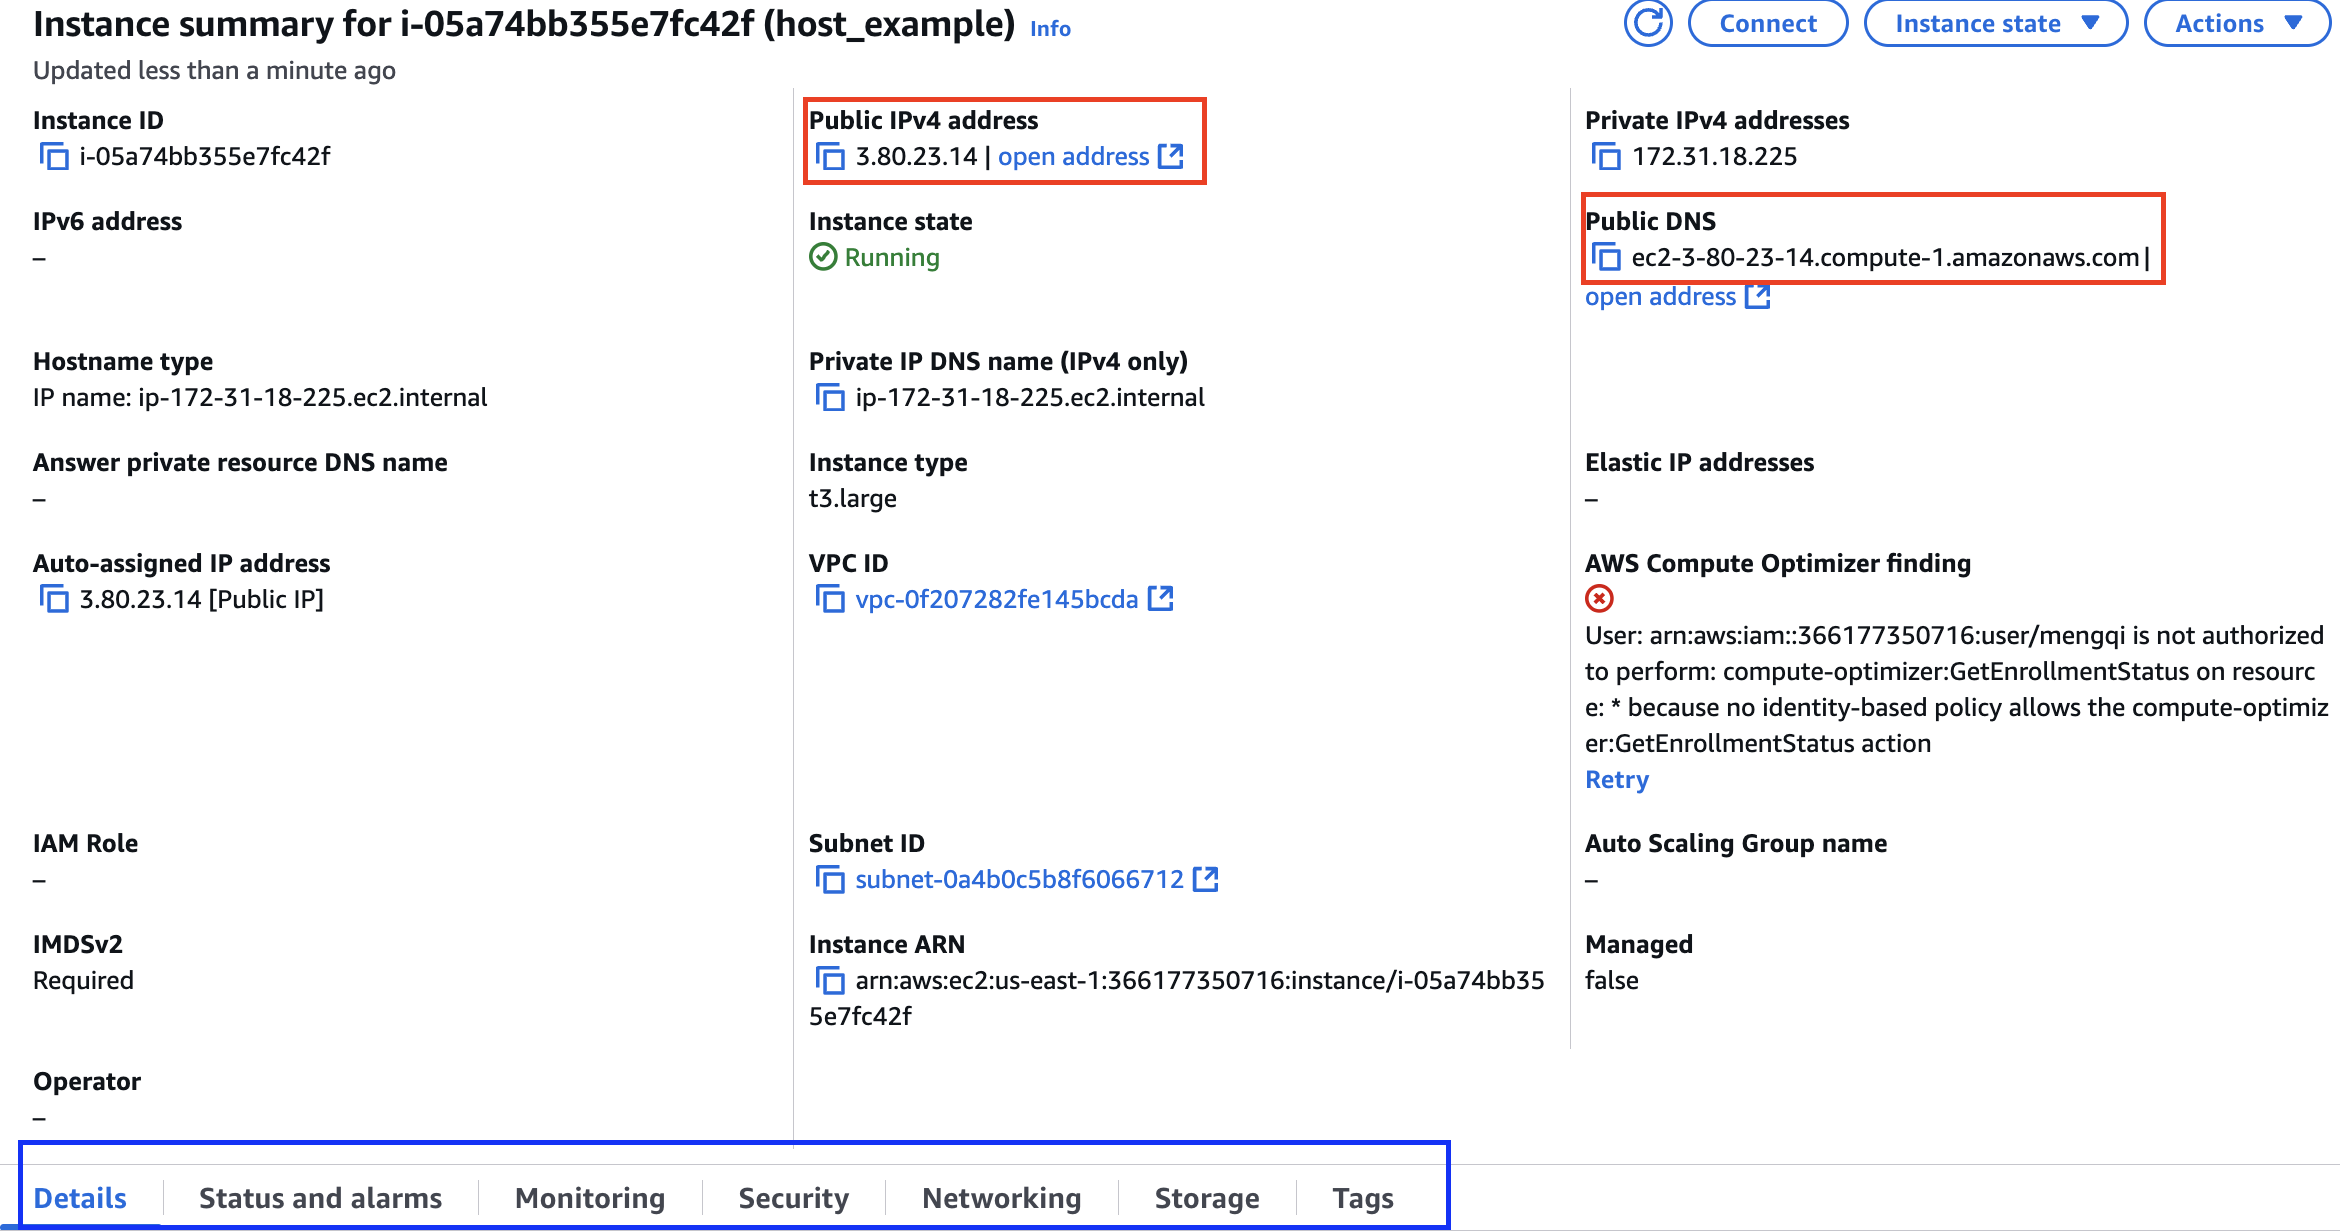
* Find your instance's **public IP** and **DNS**:
- Go to the EC2 **Instances** page on the AWS Console.
- Locate your Host instance by its ID.

* On the instance detail page:
- **Public IP/DNS**: used for browser/VNC access and SSH connection
- **Instance metadata**: e.g. storage, can be adjusted post-launch
#### Step 2: Connect via SSH or VSCode
* SSH:
```bash
ssh -i ubuntu@
```
* VSCode Remote SSH configuration:
```
Host host_example
HostName
User ubuntu
IdentityFile
```
### 1.3 Get AWS Access Keys & Secret Access Key
Click on **Security Credentials** from the drop-down menu under your account in the top-right corner.
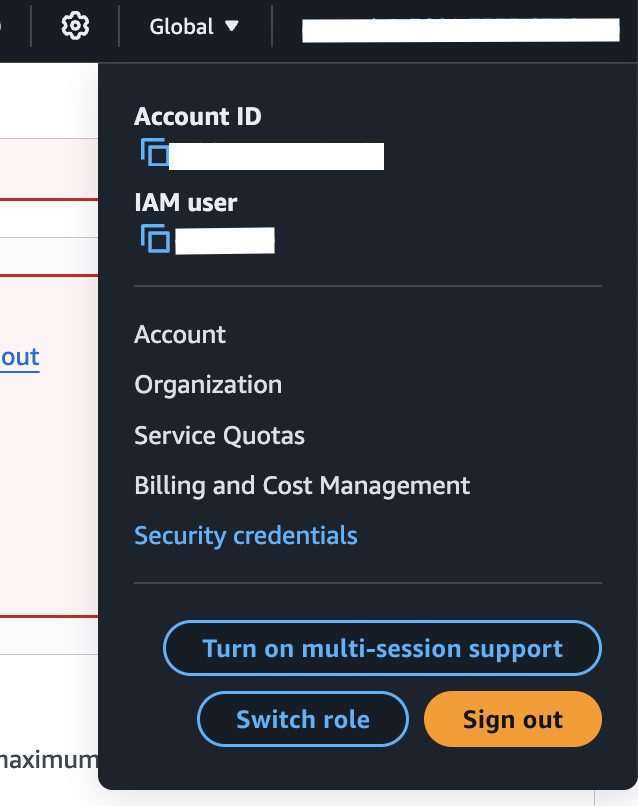
In the **Access keys** section, click **"Create access key"** to generate your own key.

## 2. Environment Setup
### 2.1 Google Drive Integration
Follow the instructions in [ACCOUNT_GUIDELINE](./ACCOUNT_GUIDELINE.md), specifically the section "Generating `credentials.json` for Public Eval". This part is necessary if using public evaluation.
### 2.2 Proxy Setup
- Register at [DataImpulse](https://dataimpulse.com/).
- Configure your credentials in `OSWorld/evaluation_examples/settings/proxy/dataimpulse.json`:
```json
[
{
"host": "gw.dataimpulse.com",
"port": 823,
"username": "your_username",
"password": "your_password",
"protocol": "http",
"provider": "dataimpulse",
"type": "residential",
"country": "US",
"note": "Dataimpulse Residential Proxy"
}
]
```
### 2.3 Set Environment Variables
```bash
export OPENAI_API_KEY_CUA="your_api_key"
export AWS_ACCESS_KEY_ID="your_access_key"
export AWS_SECRET_ACCESS_KEY="your_security_access_key"
export AWS_REGION="your_aws_region" # eg. us-east-1
export AWS_SUBNET_ID="subnet-0a4b0c5b8f6066712"
export AWS_SECURITY_GROUP_ID="sg-08a53433e9b4abde6"
```
## 3. Running Evaluations
Use the `run_multienv_xxx.py` scripts to launch tasks in parallel.
Example (with the OpenAI CUA agent):
```bash
python run_multienv_openaicua.py \
--headless \
--observation_type screenshot \
--model computer-use-preview \
--result_dir ./results_all \
--test_all_meta_path evaluation_examples/test_all.json \
--region us-east-1 \
--max_steps 150 \
--num_envs 5
```
Key Parameters:
- `--num_envs`: Number of parallel environments
- `--max_steps`: Max steps per task
- `--result_dir`: Output directory for results
- `--test_all_meta_path`: Path to the test set metadata
- `--region`: AWS region
## 4. Viewing Results
### 4.1 Web Monitoring Tool
```bash
cd monitor
pip install -r requirements.txt
python main.py
```
Then, open your Host's **public IP** on port `8080` in a browser. (eg. `http://:8080`)
For more, see: [MONITOR_README](./monitor/README.md)
### 4.2 VNC Remote Desktop Access
You can also access Client instances via VNC at`http://:5090/vnc.html`